This guide provides instructions and solutions for one of the four Vaults on the Shores of Gold Tall Tale in Sea of Thieves. If you haven't begun this Tall Tale or made it to the Shores of Gold, you can find that link to that guide section below. In the list below, you can also find the links to every other guide for this Tall Tale, including the other Vaults and the Hidden Journals.
- Sea of Thieves | Shores of Gold Tall Tale | How to Find the Shores of Gold
- Sea of Thieves | Shores of Gold Tall Tale | West Vault Guide and Solutions
- Sea of Thieves | Shores of Gold Tall Tale | North Vault Guide and Solutions
- Sea of Thieves | Shores of Gold Tall Tale | East Vault Guide and Solutions
- Sea of Thieves | Shores of Gold Tall Tale | How to Find and Defeat the Gold Hoarder
- Sea of Thieves | Shores of Gold Tall Tale | Hidden Journal Locations
We strongly recommend looking for the Hidden Journals on this adventure, as they provide much greater insight into Briggsy, who is what we believe to be the main character in this whole questline. Since you'll be exploring the island for this
Sea of Thieves | Shores of Gold Tall Tale | South Vault Guide & Solution
How to Solve
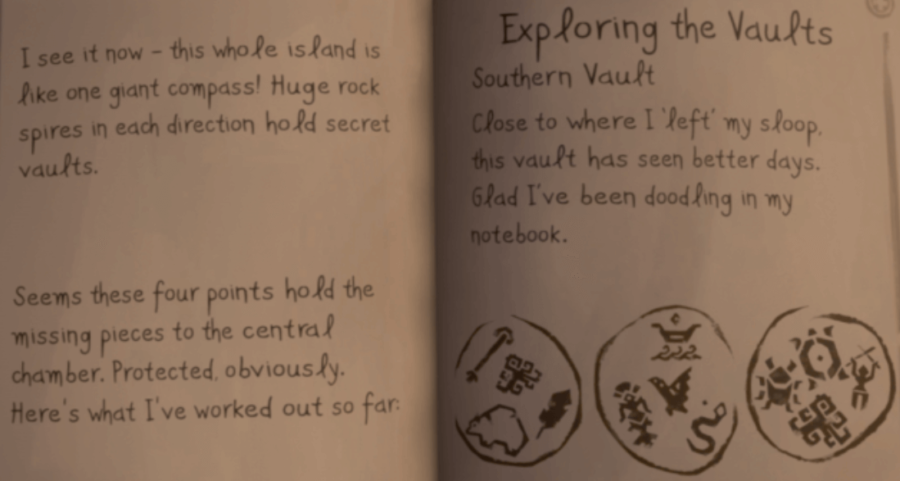
To solve the South Vault, you need to use Briggsy's notes about it in the Quest Book. She has been doodling some of the symbols she has found along her travels and somehow managed to group them into the correct sections. Your task is to turn the pillars to match the symbols in each group.
Related: Sea of Thieves Fishing Guide: How to Catch and Sell Fish - Pro Game Guides
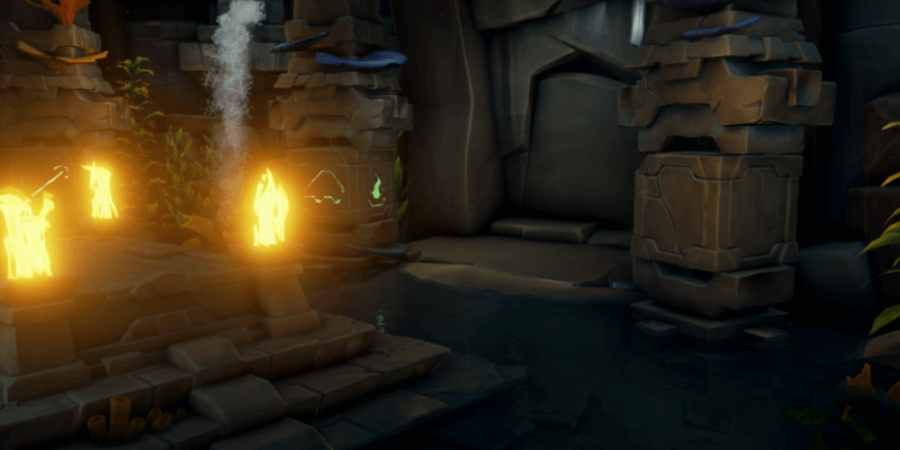
You'll find as you enter the Vault is that one of the pillars is cracked and disabled. You are not able to turn it, which leads to the question: What do we do?
You still have to match the symbols with the one in the book, but you have to determine which one needs to be left out of the solution. We assume this was a mechanic implemented by the game developers to complicated things. Still, all it led to was that we now only need to match three symbols instead of four.
The most difficult part is that once this Altar is activated, the room fills up with water very quickly. Beyond that, you truly do just need to figure out which symbol is the odd one out. You need to turn the pillars to match the other three icons three times for this hidden room behind the wall to be revealed.
Return the Medallion
Take the Medallion to the Compass Room on the peninsula just south of the North Vault's peninsula. It will automatically fit in the slot on the left side.
What's Next
There are other vaults to solve! The following links will provide you with the guides and solutions for the other three vaults: West, South, and East. Before you enter the Gold Hoarder's chamber, we recommend you start searching for the Hidden Journals! If you have found all four medallions, proceed to the guide on How to Find and Defeat the Gold Hoarder!
Did you find an Ashen Chest on your travels? Check out our guide on How to Find an Ashen Key to unlock it!
ncG1vNJzZmiooqS0ornEoKyinJWoe6S7zGiqnpldpLNuwMeinK%2Bdo2TAsMHToWSvmaWhwW6%2FzqWsraGfo8Buv8SaZKieXam1qrHVnqpmq5ikv6a%2FjKidZp%2BfobFuwMClo2askaGycA%3D%3D